Monday, July 30, 2012

Thanks a latte

Hi Y'all!  These were so much fun to make!!!  :) 
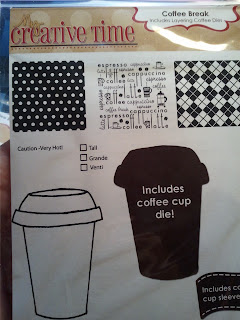
I needed gifts for some of my kid's teachers.  (Yes, I am late postign this but better late than never!).  It is hard to think of somethign that would be good for both men and women.  I have a ton of pictures, but this was a lot of steps so Iguess it fits.  I used Emma's stamp set to stamp and diecut the little coffee cups and they are awesome to make - easy and fun!  I also  bought Starbucks gift cards and asked them for empty coffee cups.  I made coffee bean cookies by making pre-made sugar cookies and then frosting them with regular frosting that I mixed about 4T of Karo syrup to so that it would harden.  I then melted some choc chips and traced the cookie to make them look more like coffee beans rather than just a blob.  They didn't turn out as cute as I ahd pictured.  I wanted small, thick cookies but ended up with regular sized cookies - but that's okay.  They turned out just fine.  I added the cooked to a cello bag and tied with baker's twine.  Put the cookies and the gift card in the cup then cello'd the cup and more baker's twine tied the  bow and added the card.  That's it.  They loved them!  :)  YAY!

 I found the idea on my BBFF Christy's blog and knew they would be PERFECT - I was right!  :)

Enjoy!
Tammy


Friday, July 27, 2012

Foodie Friday Smokehouse Chicken

YUM!!
This is a recipe I adapted from Plain Chicken...that is a great site, you should check it out!  Not only is she fun to read, she also has AMAZING recipes that are far from plain!  :) 
Anyway this recipe is really, really, really good! 

Smokehouse Chicken
4 chicken breast, pounded to an even thickness
1 bottle Lawry's marinade - I think I used a steak one becausae that is what I had on hand
8 slices thick cut apple-wood smoked bacon
1 box fresh mushrooms, sliced - more than she had cause I love 'em
1 cup cheddar cheese, grated
1/2 cup BBQ sauce

Marinate the chicken in the Lawry's Original Seasoned Salt marinade for at least 30 minutes. The longer the better.  I had mine in the marinade for over a day. 

While the chicken is marinating, cook the bacon in a large skillet. Set aside. Reserve 2 Tablespoons of bacon fat. Sauté mushrooms in bacon fat until softened. Set aside.

Grill the chicken 12-15, minutes until done. You can also cook the chicken in a skillet on the stove if desired.

Preheat the broiler on your oven. Place cooked chicken on a rimmed baking sheet. Spread 1-2 Tbsp BBQ sauce on cooked chicken. Top with bacon, mushrooms and cheese. Broil until cheese is melted.
 This is what it looked like as I was putting it all together.  YUM!!

Thursday, July 26, 2012

Classic Birthday

Hi friends!!  I needed to make a card for Mike's dad's brithday.  I don't know about you, but sometimes I have a hard time making masculine cards.  I know I've said it before, but I LOVE my cricut!!!  :)  Sometimes things that seem so daunting are made so easy thanks to my princess! 
I used the Nifty 50's cartridge and put this nifty card together for him.  I think it turned out really cute and he loved it!
TTFN,
Tammy


Tuesday, July 24, 2012

Sunflower Card

I needed to give a friend a thank you and she loves sunflowers.  I found this digi and knew I had to use it!  It was pretty easy to make - colored with my digis, embossed the front of the card and added a little yellow at the bottom and some yellow ribbon.  I sponged some yellow on the inside too.  :)
Thanks for looking and have a good day!
Tammy

Monday, July 23, 2012

Rugby signs

My son decided to play rugby this year.  It's the first year that our town has offered it to 6th graders.  He was VERY excited to play and they ended the season winning a few games and making it to the championships, but lost after their fist game.  That's okay.  There is a lot to learn and this is a weird sport.  Catching on a bit here in my town, but not big yet at all.  We have two schools in our town.  Both in the same school district and usually we are competitiors but for a few sports - rugby included - we join together to form one big team. 
I made these posters for my daughter and I to hold for the games.  They were much easier than it looks thanks to SCAL!  I found the image online and instead of cutting everything out with the cricut I put in a marker and let it draw it instead.  That was WAY easier than trying to piece all fo that together and finding the right colors etc.  this way I just colored it when it was done.  I did it on a 12x12 pice of cardstock and made two of them. 
I love them and have them stored away for next year! :)
TTFN,
Tammy


this was part of a cupcake cake...myu son is the one on the top right.  Pretty cool - I wish I'd gotten a picture of the whole cake, but i didn't even know it was there until Alex brought this to me.  I love that kid!

YAY, Fishers!!!
TTFN,
Tammy

Saturday, July 21, 2012

Pocket kleenex card

I don't really like making sympathy cards but it is an evil necessity sometimes.  I have a friend who is going through a really rough time.  I love this idea.  I took a stamp i have had for a while of the jeans pocket and just stamped it on blue cardstock and folded up a kleenex to put inside.  I like it.  :)
Tammy

Friday, July 20, 2012

Foodie Friday...Amazing Meatballs

Okay, first I have to say that I FORGOT to take pictures of this AMAZING creation!!!  :(  Boo!!!  But I was having the newlyweds over for dinner and I wasnt' thinking of photos at the time.  Sad, but true.  This photo I found on Google images and it is from http://foodsessed.com/2010/04/09/spaghetti-and-meatballs/ looks pretty close only my balls were even bigger and my sauce was thicker.    Check out her recipe too though as it does look and sound yummy for spag and meatballs.  This recipe is only for meatballs.  I debated about whether to do pasta or not and really I just wanted the meatballs!!!  SO, last minute I quickly made some of the Lipton Pasta Sides butter flavored noodles to go along side.  We also had a nice green salad with almonds and mandarin oranges and balsamic vinegar...it was yummy.  I also made some Italian Herb bread in my bread maker and a cucumber salad.  Oh, and chocolate cobbler for dessert. YUM!!!
Okay...here's the yumminess...


Saucy Meatballs

Sauce: (Make in Stew Pot)
Large can tomatoes (used the ones with Italian seasonings)
Regular sized can of tomato sauce
2 peppers chopped
4 plum tomatoes
1 onion
1 T brown sugar
1 T instant coffee
5 T cider vinegar
Salt – a little more than you think – the tomatoes need it
Pepper
Worcestershire sauce – about 10 shakes
Garlic – about 1 ½ T
Beef bouillon – I use the better than Bouillon and I used about 2 t (I’d say 1-2 cubes)
Paprika – about 4-5 shakes
Parsley – handful – saved this for the tipping

Pan on high heat add tomatoes, peppers, onion and let it steep and reduce on high heat add other ingredients and stirring occasionally leave on high (6ish) while you make the meatballs.  When you start to brown the meatballs the sauce should be a beautiful rich, thick texture and you can turn the heat to medium (4ish).  I also used my emulsion blender and blended it up a little so it was smooth.

Meatball ingredients: (make in high-rimmed skillet)
EVOO
Beef/pork mixture – I used 3 pounds (6 servings)
2 eggs
Couple handfuls breadcrumbs
Italian seasoning – about a tablespoon
Salt
Pepper
Cheddar cheese

Heat pan up with EVOO and then mix beef/eggs/crumbs/seasonings together.  Form a large ball and then poke a hole and fill with cheese being careful to reform ball. 
Brown all sides in hot skillet

Preheat oven to 350’

Combine!
When the balls are tan on all sides I added the sauce to the balls and move the meatballs around to get saucy.  Top with parsley leaves.  Put in the oven for about 45 minutes.

Enjoy!!!

Tammy

Thursday, July 19, 2012

Boston Terrier Card


I have a friend who has a Boston Terrier and her name is Daisy...she's so sweet!  I knew as soon as I saw this pup on my gypsy I knew I had to make a card for my beautiful friend.  I think it turned out really cute! 

The only problem with my Gypsy (not that it is a true problem) is that I never remember the cartridges that I use when I make something.  I know I welded the pieces together for form the card.  Fun to make!!!
Enjoy!
Tammy


Monday, July 16, 2012

Wedding Honeymoon card

YAY!!!  This turned out even cuter than I had pictured it in my head!!!  I love it!  I saw the idea on Pinterest and with my sweet cricut I was able to make it pretty easily!  I cut out the images and then embossed some.  I also used this awesome sand stuff that I found online.  I am looking for where I got it but I can't seem to find the store.  If you want to see the bottle though, email me and I will be happy to send you a picture.  It is made for scrapping and it's really cool.  I have one with sand and one with shells.  I purchased them one day while in Florida and looking for scrapping stuff to scrap our vacation.   
I used ink pads to color the backgrond and then added the beach on the bottom of the card, added two palm trees and hung the clothesline and clips from Stampin' Up and popped up the clothes.  SO CUTE!
I really LOVE it!!!
 Enjoy your day!
Tammy


Sunday, July 15, 2012

Wedding Week - Bride!

Honestly, she's the most beautiful bride I've ever seen.  And trust me, she's even lovlier on the inside!  What a great girl!  Great friend, great person, great daughter and now a great wife!!!
Love you, SA!! :)
Below are some pics right before the last alteration of her beautiful lace dress.
TTFN,
Tammy


We had some problems with the bustle.  Wow...that is harder than I expected, but it sure is beautiful!!  :)

Saturday, July 14, 2012

Wedding Week - Cake Topper


 I so wish I had a better picture because this really turned out cute!

This was fun to do although it was several steps and took a while to dry.  First thing I did was cut out a D using the elegant cake cricut cartridge.  I cut it out twice on medium board and then glued them together.  I then used modge podge to glitter it up.  I coated it with mp, glitter, mp, glitter, mp, glitter, mp while letting it dry between steps
Below is what it looked like with the final coat of MP.  I wasn't positive it would even dry

Luckily it did and it was beautiful!  I think you could use it just like this, but we wanted to bling it up a bit.  I added gems from HL in purple and khaki - they were on sale so we got them for about $16 total.  Two packs of 25 per color worked out perfectly!


BEAUTIFUL if I say so myself!  :)

LinkWithin

Related Posts Plugin for WordPress, Blogger...